Fort Canning and the area around it have been an important military site since the early days of British Singapore. Its history goes back to the time of Sir Stamford Raffles, long before the Meiji era, when Japan began to emerge as a major military power in Asia. Originally known as Government Hill, it was also the site of Raffles’ residence. Military facilities were later added, and the hill gradually became an important center for defence and command.
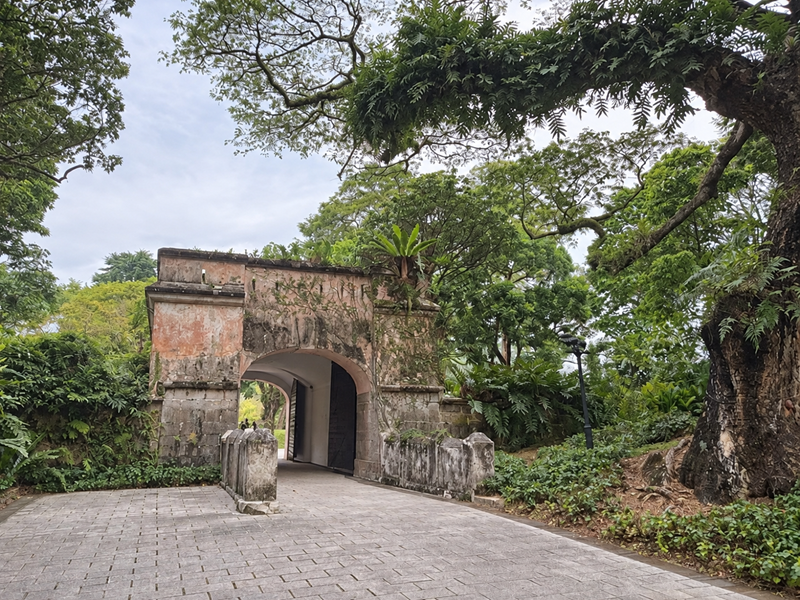
Standing about 43 metres above sea level, Fort Canning once offered a good view of the surrounding town and Singapore Harbour. Before taller buildings began filling the city skyline, one could look towards the southern coast and harbour from the hill. This made it a natural choice for military use, allowing the British to observe the harbour and town while remaining close to Singapore’s main administrative centres. Today, much of that view is blocked by buildings.
Built into the hill is a military bunker now better known as the Battlebox. Although commonly described as an underground bunker, it is still above sea level. It sits beneath the surface of the hill rather than deep below the surrounding ground. The Battlebox was only one part of the larger Fort Canning Command Centre, which also included the main headquarters building, barracks and accommodation for military personnel. Most of the main buildings had been completed by around 1927. The bunker came later, as the threat of war in Asia grew, providing a protected place where commanders and their staff could continue working during air raids and bombing.
Fort Canning had served as the headquarters of Malaya Command before the war, but the main command headquarters was moved to Sime Road shortly before fighting began. As the Japanese advanced into Singapore and the fighting drew closer to Sime Road, Lieutenant-General Arthur Percival moved his command headquarters back to Fort Canning on 11 February 1942. For the next few days, the Battlebox became the main command centre from which Percival and his senior commanders directed the defence of Singapore. It was also where the decision to surrender was made on 15 February 1942.
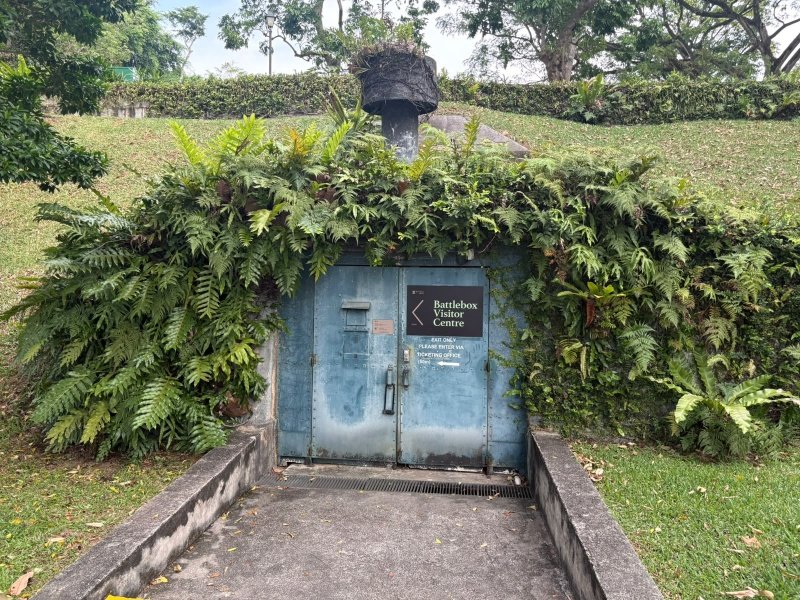
From outside, it is difficult to imagine how much space there is inside. The bunker covers about 1,166 square metres, roughly the combined floor area of around 12 modern four-room HDB flats. Inside are more than 20 rooms connected by corridors, including rooms for operations, communications, signals and other supporting functions. What looks like a modest entrance leads into a much larger command centre hidden within the hill.
From the surface, there is little sign of the bunker hidden inside the hill. I bet many visitors to Fort Canning walk past without even knowing it is there. I visited the bunker late one weekend afternoon. Entry was free, but an online booking was required. You could book on the day itself as long as slots were still available. The visit was self-guided, with the option of paying an additional SGD 20 for an audio guide and access to the projection room. There were only a handful of visitors and a few staff around when I visited. There were probably more wax figures than real people in the whole bunker.
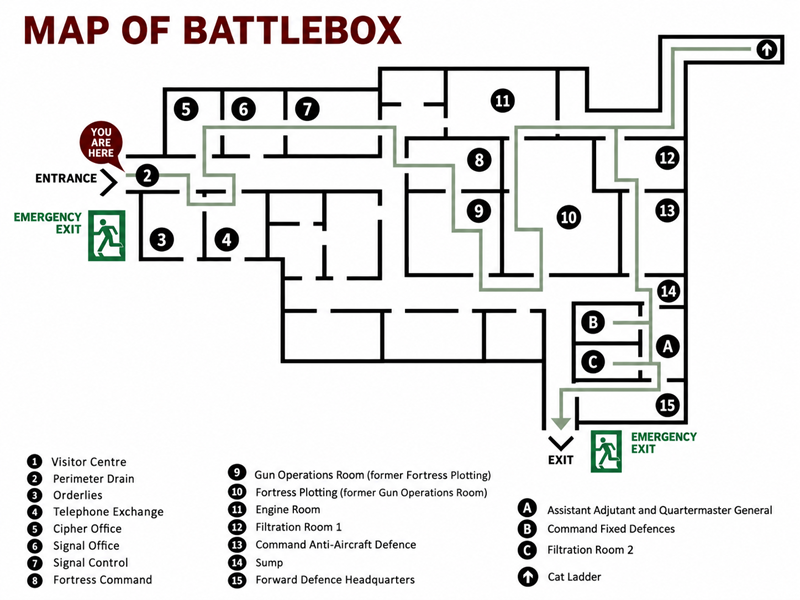
The number of rooms in the Battlebox varies depending on the source, with some stating around 23 and others 29. Visitors today do not get to enter all of them. Some rooms have wax figures, old equipment and furniture, which you can only view from the doorway. Others are used for building services or are outside the visitor route. The rooms include a Telephone Exchange for connecting calls, a Cipher Office for coding and decoding messages, and command rooms for coordinating Singapore’s defence, coastal guns and anti-aircraft operations. There is also the room where Percival and his senior officers discussed surrender on 15 February 1942, as well as an Air Filtration Room to supply filtered air to the bunker.


Above Orderlies’ Room was where soldiers could take a break and rest between duties in the bunker. Interestingly, the white porcelain washbasin doesn’t look particularly old. It wouldn’t look out of place in a bathroom today.
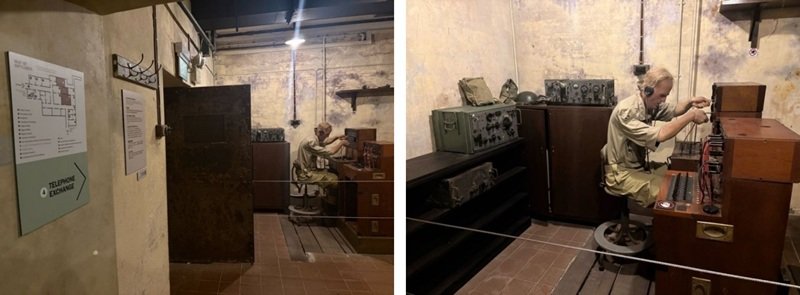
The Telephone Exchange was where operators connected calls between the bunker and other parts of Singapore and Malaya. Calls had to be connected manually through the switchboard, allowing commanders to receive updates and give orders to troops in the field.
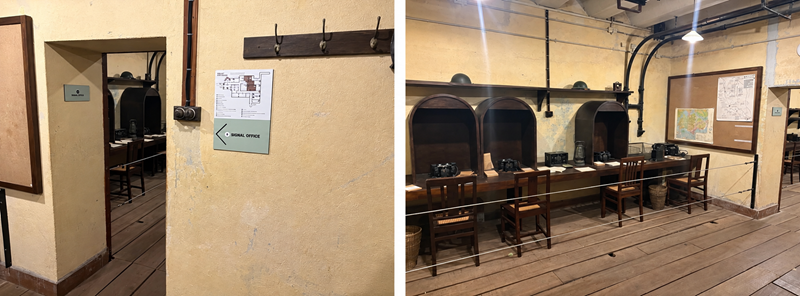
The Signal Office was where incoming and outgoing military messages were handled. The Telephone Exchange next door was where operators connected telephone calls.
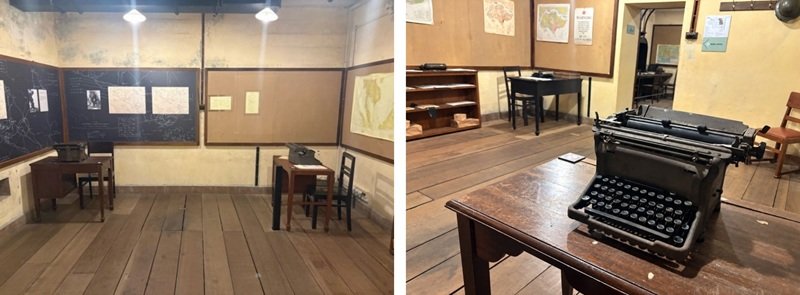
The photo above shows the Cipher Office, where outgoing British military messages were coded and incoming coded messages were decoded. Being born in the 1970s, I am still quite familiar with the typewriter on the table. Those born after 2000 might find it more of a museum curiosity.
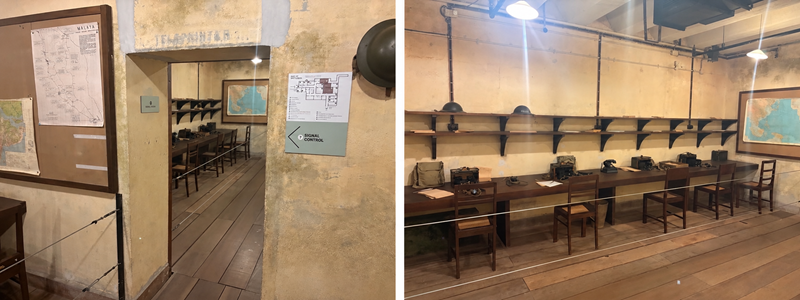
According to the information board in the bunker, the Signal Control Room shown above maintained direct contact with the battlefront in northern Malaya until the fall of Malaya.

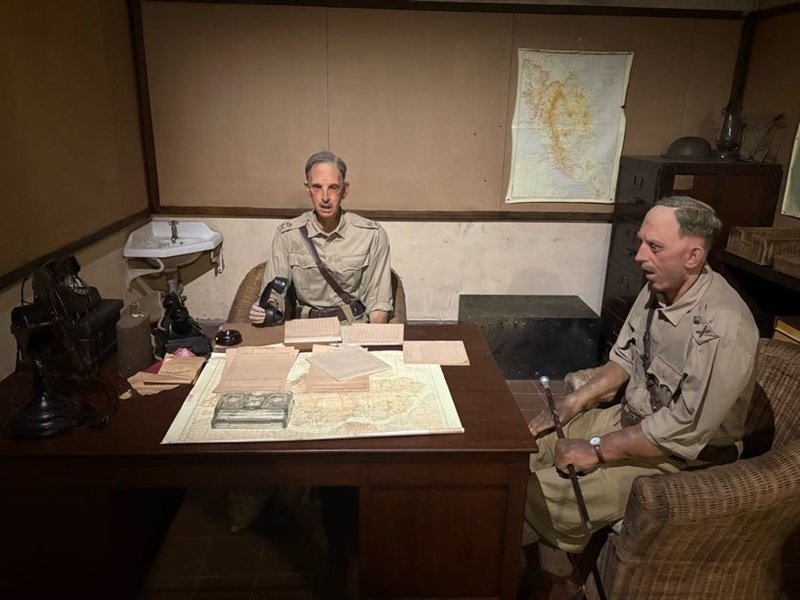
The Fortress Commander’s Room was the office of Major-General Frank Keith Simmons, who was in charge of Singapore’s defence. Reports from the battlefield were brought here to help him assess the situation. After Singapore fell, he became a Japanese prisoner of war and remained in captivity until 1945.
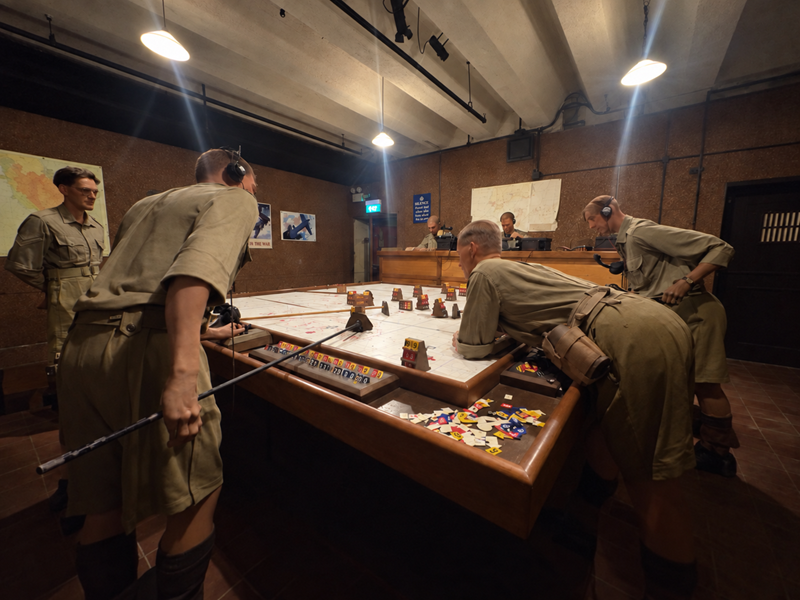
The Gun Operations Room was where staff used markers on a large map table to track movements based on reports coming into the bunker. It helped coordinate anti-aircraft defence and was also used to track Japanese troop movements in the final days before Singapore fell.
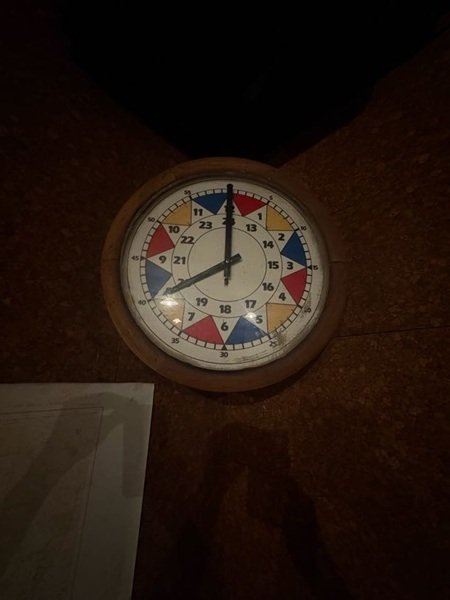
At first, I thought the pretty clock above was just for decoration. Only after Googling did I realize it was actually a sector clock. Its red, yellow and blue sections each represent five minutes and match the colored markers used on the plotting table. This helped staff tell at a glance how recent each aircraft report was.
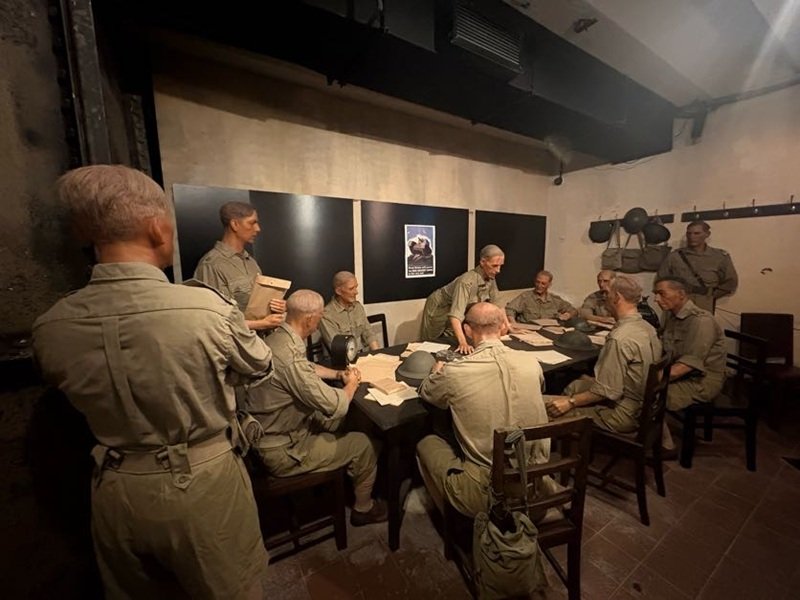
The room above was originally the office of the Commander of Anti-Aircraft Defence. It is now set up with wax figures showing the meeting on the morning of 15 February 1942, when Percival and his senior commanders decided to surrender Singapore. It must have been a heavy decision to make, especially with Singapore seen as a fortress and Winston Churchill insisting that they continue fighting.
Percival became a POW and was taken from Singapore to Taiwan, then to Manchuria. He survived the war and later stood behind General MacArthur aboard USS Missouri to witness Japan’s surrender on 2 September 1945. From surrendering Singapore to witnessing Japan surrender just over three years later.
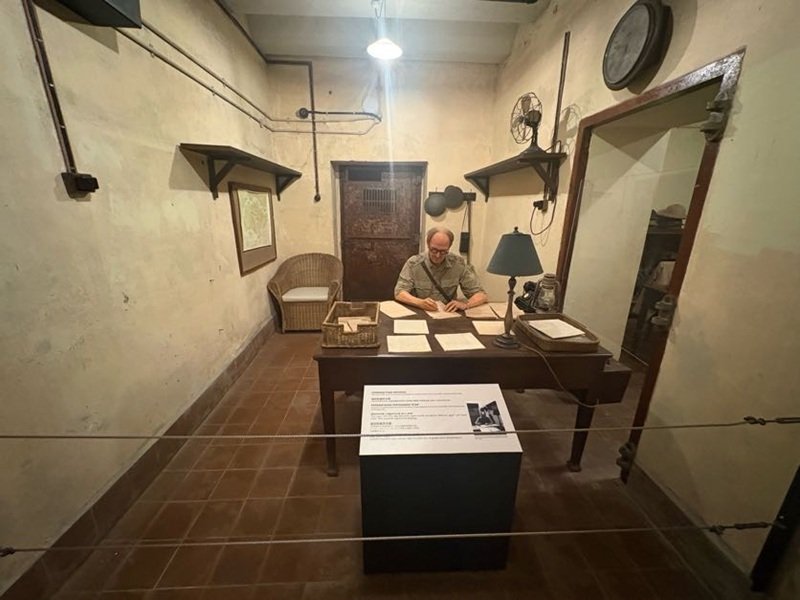
The room above was the office of the Commander of Fixed Defences, Brigadier A. D. Curtis. He coordinated Singapore’s coastal artillery from the bunker, using the big guns to defend against attacks from the sea. It must have felt like a thankless job, as the Japanese came down the Malayan Peninsula instead. Some guns were turned inland to fire at the advancing troops, but they could not stop Singapore from falling. Curtis became a Japanese prisoner of war after Singapore fell.
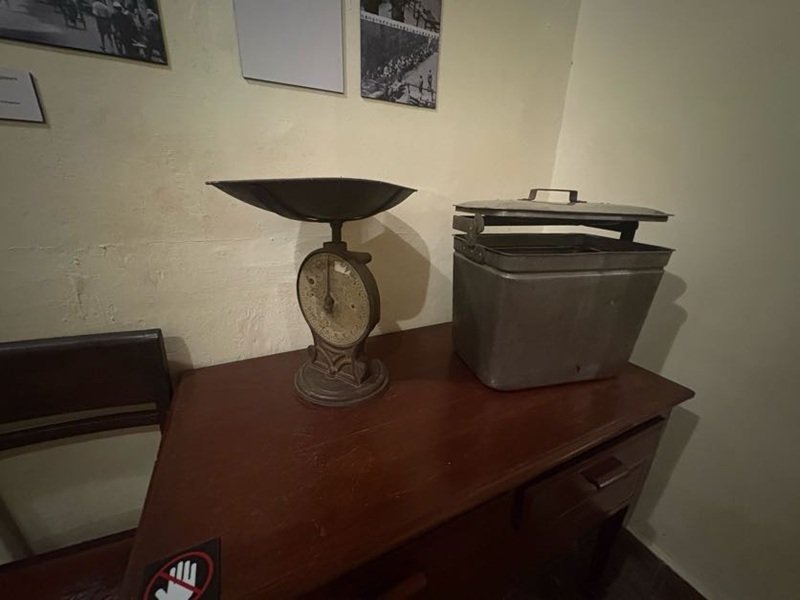
An old mechanical weighing scale and a metal container, possibly used for military rations, are displayed in the Assistant Adjutant and Quartermaster General’s room. The Assistant Adjutant and Quartermaster General (AA&QMG) was a senior staff officer responsible for personnel administration and logistics, including supplies, transport and accommodation.

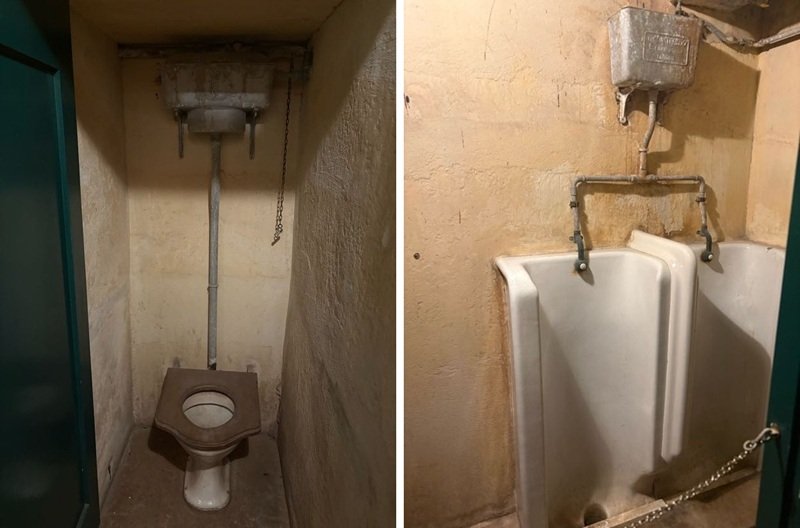
The flush toilet and urinals do not look very different from those we use today. Notice the “WC” sign at the entrance to the toilet. WC stands for “Water Closet”, an older term for toilet.
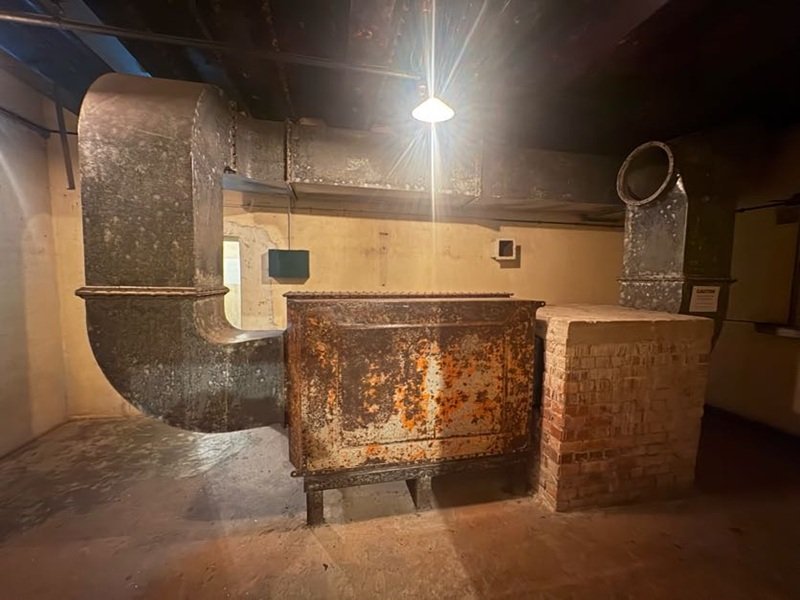
Above is the bunker’s ventilation and air filtration system. It helped keep the air breathable for those working inside and was also designed to protect against possible poison gas attacks. There is also a sump system in the bunker for collecting rainwater before it is channeled out, helping to prevent flooding inside.
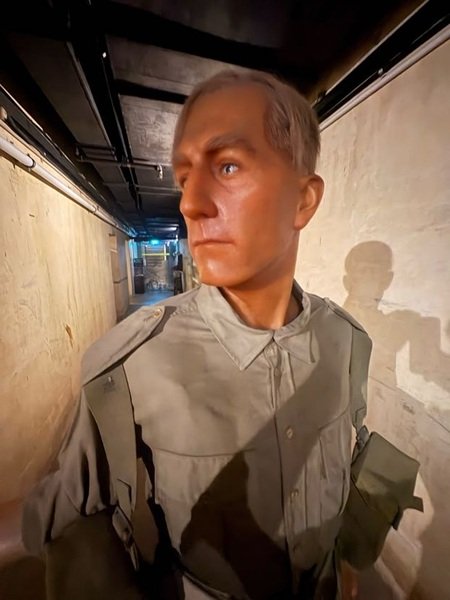
The wax figures in the Battlebox looked quite aged. They may already be close to 30 years old, dating back to around the time when the museum first opened. Together with the dim lighting and the bunker atmosphere, some of them can actually look quite scary. There was one figure standing right in the middle of a corridor to block off entry into a closed section. I stumbled upon it when I turned into the corridor from one of the rooms. For a split second, I really thought there was someone standing there.
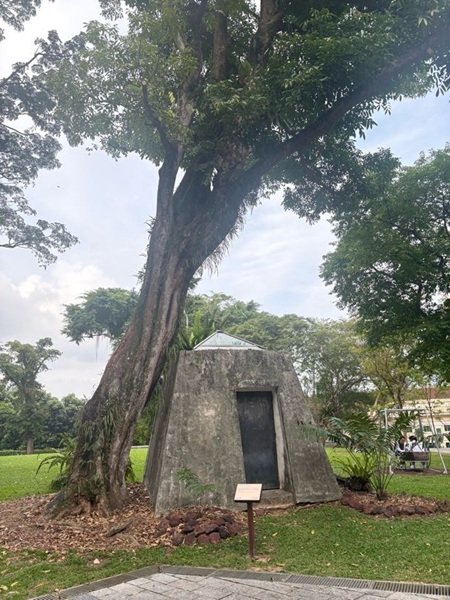
This is the Battlebox Escape Shaft, located near the old Fort Gate at the top of Fort Canning Hill. It served as an emergency escape route from the underground British military command bunker during World War II. Behind the metal door is a vertical shaft with a ladder leading down into the bunker. The structure was believed to have been camouflaged during the war to prevent the enemy from discovering it. Unfortunately, the escape shaft is not open to the public. It would have been a perfect way to end the Battlebox tour if visitors could climb up the shaft and emerge above ground, just as it was originally intended to be used.
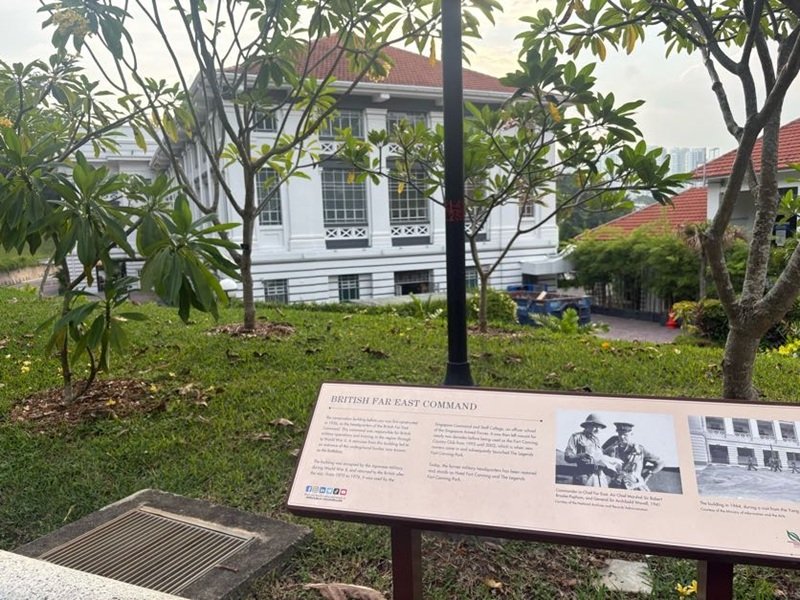
This is the former British Far East Command headquarters building at Fort Canning Hill, located just a stone’s throw from the Battlebox. Built in the 1920s, it served as an important British military headquarters before and during World War II. Percival also had his office in this building. The Fort Canning Command Centre during World War II consisted of three main parts: the above-ground headquarters building, the underground Battlebox bunker, and the military barracks located on the other side of Fort Canning Hill.